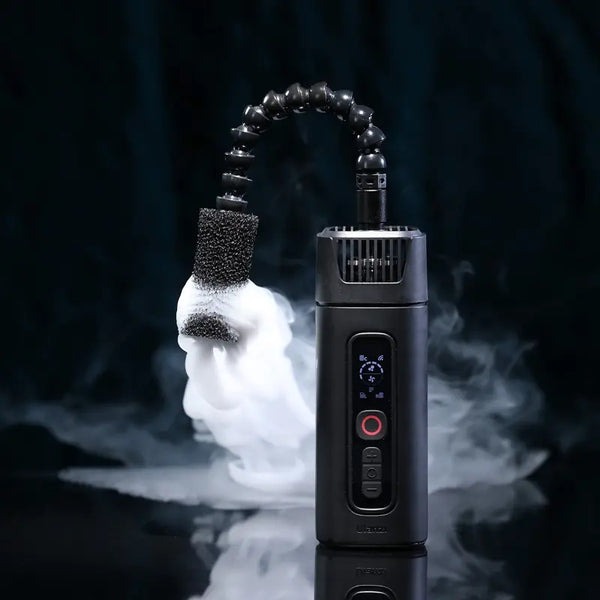
There’s something undeniably magnetic about fog rolling through a frame — the way it softens harsh edges, wraps around a subject, and transforms an ordinary backdrop into something cinematic. Whether you’re shooting a moody portrait in a dimly lit studio or capturing an ethereal landscape at dawn, fog has the power to elevate your photography from flat to extraordinary. It adds depth where there was none, mystery where the scene felt predictable, and a sense of drama that draws viewers deeper into the image.
But here’s the catch: working with fog machines isn’t as simple as pressing a button and letting the atmosphere build. Without proper knowledge, you risk triggering fire alarms, overheating equipment, exposing yourself and your team to harmful residues, or simply wasting hours battling uncooperative output. The key lies in understanding how to balance creative ambition with responsible operation. This article walks you through everything you need — from choosing the right fog machine and understanding its safety features to mastering fog intensity for the exact mood you’re after. By the end, you’ll have the confidence and practical know-how to create breathtaking, fog-filled shots without compromising anyone’s safety.
Understanding Fog Machines: Types and Basic Operation
Not all fog machines work the same way, and choosing the right type can make or break your shoot. Water-based fog machines are the most common and photographer-friendly option. They heat a mixture of water and glycol or glycerin to produce a thick, white vapor that disperses evenly and dissipates at a manageable rate. Oil-based machines, sometimes called hazers, generate a finer, longer-lasting mist that’s ideal for subtle atmospheric effects and catching light beams, though they require more careful ventilation. CO2-based machines offer an entirely different look — they blast dense, low-lying fog that hugs the ground and vanishes quickly, perfect for dramatic floor-level effects in portrait or fashion work.
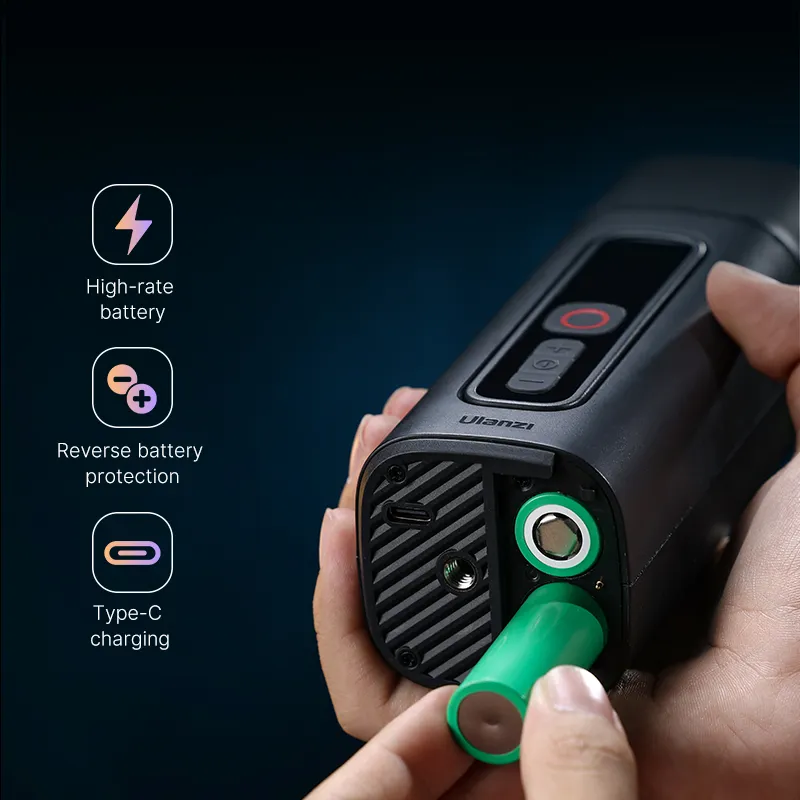
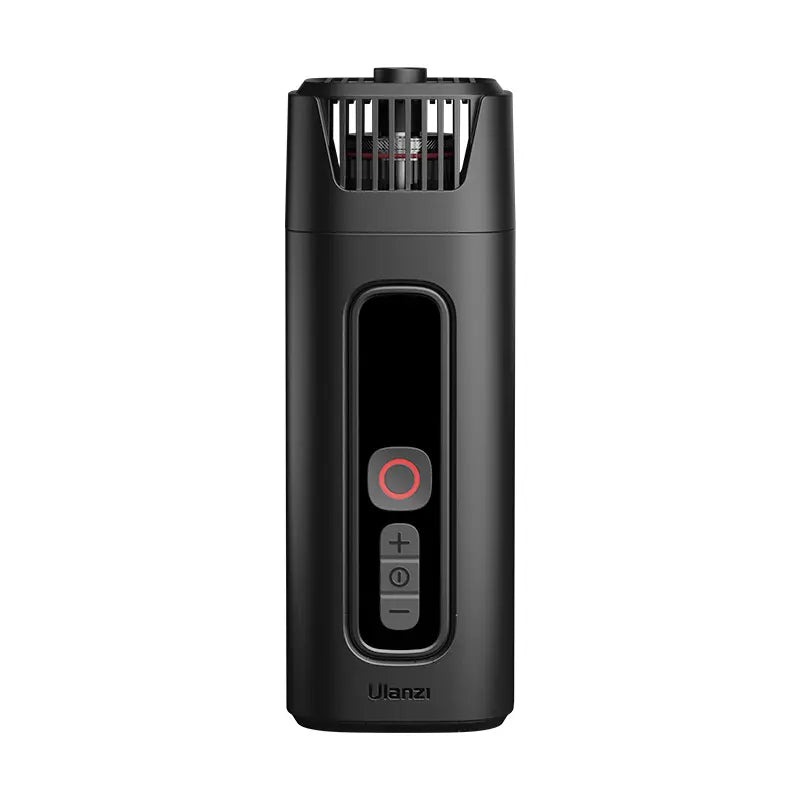
At the core of every fog machine are two essential components: a heating element and a fluid reservoir. The reservoir holds your chosen fog fluid, which a pump feeds into the heating element — essentially a thermostatically controlled block that rapidly vaporizes the liquid. Once the heater reaches optimal temperature, the machine is ready to output fog on demand, typically controlled via a wired remote, wireless controller, or built-in timer. For photographers, understanding this basic mechanism matters because it directly affects how much control you have over fog density, duration, and consistency during a shoot. The more familiar you are with your fog machine’s operation cycle, the more precisely you can time bursts of atmosphere to coincide with your shutter clicks.
Essential Safety Features in Fog Machines You Must Know
Before you ever fill a reservoir or flip a power switch, take time to familiarize yourself with the safety features built into your fog machine — they exist to protect both you and your gear. The most critical is auto-shutoff, a mechanism that powers down the heating element when the fluid reservoir runs dry. Without it, the heater continues operating with nothing to vaporize, which can warp internal components, produce toxic fumes from burning residue, or in extreme cases cause the unit to catch fire. If your machine lacks this feature, you’ll need to monitor fluid levels manually and vigilantly throughout every shoot.
Overheating protection works hand-in-hand with auto-shutoff. A built-in thermostat regulates the heating block’s temperature, preventing it from exceeding safe limits during extended use. This is especially important during long photography sessions where you might run the machine intermittently for hours. Some models also include fluid level indicators — either a transparent reservoir window or an electronic sensor — that give you a clear visual or audible warning before the tank empties. Understanding these safety features in fog machines isn’t optional; it’s foundational. Neglecting them shortens your equipment’s lifespan, creates unpredictable hazards on set, and puts everyone in the vicinity at risk. Always verify that these protections are functional before each use, and never bypass or disable them for the sake of convenience.
Step-by-Step Guide to Safely Operating Your Fog Machine
Getting dramatic fog effects on camera requires more than creative instinct — it demands a disciplined approach to setup and operation. Rushing through preparation is where most accidents and frustrating malfunctions originate. The following breakdown covers everything from your initial inspection to environment-specific strategies, giving you a reliable workflow you can adapt to any shoot location.
Pre-Operation Safety Checklist and Setup
Start every session by physically inspecting your fog machine. Check the power cord for fraying or exposed wires, examine the fluid reservoir for cracks or leaks, and confirm the heating element housing is free of residue buildup from previous sessions. Next, fill the reservoir with the manufacturer-recommended fog fluid only — never substitute with homemade mixtures or fluids designed for a different machine type, as this can clog the pump, damage the heater, or release harmful chemicals. Once filled, position the machine on a stable, heat-resistant surface away from flammable materials like fabric backdrops or paper props. Secure all cables with tape or cable covers to prevent tripping hazards, especially on sets where models or crew members are moving. Finally, ensure your workspace has adequate ventilation before powering on. Even a brief test burst in an unventilated room can overwhelm the space with fog faster than you’d expect, reducing visibility and irritating airways.
Operating in Indoor Settings: Studios and Controlled Environments
Indoor shoots offer the advantage of controlling fog movement, but they come with unique risks. Your first priority should be addressing smoke detectors — fog machines will trigger standard ionization-type alarms. Notify your building management beforehand and, where permitted, temporarily cover nearby detectors with approved caps designed for this purpose. Never disconnect or disable fire alarm systems entirely. Ventilation management is equally critical: open a window or door on one side of the room to create a gentle airflow path that prevents fog from accumulating to uncomfortable or unsafe density levels. If you’re working with talent or a crew, brief everyone on the machine’s location, the planned fog output schedule, and where fresh air access points are. Keep sessions with continuous fog output to manageable intervals — run the machine for your planned shots, then allow the space to partially clear before the next round. This protects everyone’s respiratory comfort and gives you better visual control over fog density in your frames.
Operating in Outdoor Settings: Managing Wind and Elements
Outdoor fog work is a battle against the elements, but a winnable one with the right preparation. Wind is your primary adversary — even a light breeze will scatter fog before it has time to settle into your frame. Position the machine downwind of your shooting area and use physical barriers like reflector boards, portable walls, or even parked vehicles to create a sheltered pocket where fog can accumulate. Timing your bursts between gusts, rather than running continuously, conserves fluid and produces denser, more photogenic results. Moisture is another concern: morning dew, rain, or damp ground can damage electrical components, so elevate your machine on a dry platform and keep all connections off wet surfaces. Use weatherproof extension cords rated for outdoor use, and if you’re relying on a generator, place it far enough away that engine vibration and exhaust don’t interfere with your set. Always have a dry cloth on hand to wipe down the machine between takes, and pack it away promptly once the shoot wraps to prevent condensation from settling inside the unit overnight.
Creating Stunning Fog Effects for Dramatic Photography
Once you’ve nailed the safety fundamentals, the real fun begins — shaping fog into a storytelling tool that serves your creative vision. Fog effects work best when they feel intentional rather than accidental, which means thinking beyond just “more fog equals more drama.” The secret lies in treating fog as you would any other element of composition: with purpose, restraint, and awareness of how it interacts with light, color, and space. A thin veil of haze can add warmth and nostalgia to a golden-hour portrait, while a thick, rolling cloud can transform a simple hallway into something out of a thriller. The difference between amateur fog use and professional-grade atmosphere comes down to how deliberately you control what the machine gives you.
Mastering Adjustable Fog Intensity for Desired Atmospheres
Most fog machines offer some degree of adjustable fog intensity, whether through output level dials, timer intervals, or remote controls that let you trigger short or sustained bursts. Learning to manipulate these settings is where your creative control truly lives. For a subtle, diffused haze that softens backgrounds and makes light beams visible, use low output with longer intervals between bursts — let each layer settle and thin naturally before adding more. This approach works beautifully for lifestyle shoots and editorial work where atmosphere should enhance without overwhelming. For dense, cinematic fog that fills the frame and obscures background detail, increase the output level and shorten intervals, building layers quickly before the earlier fog dissipates. Pay close attention to how your fog interacts with your lighting setup: backlighting cuts through fog dramatically and reveals texture within the vapor, while front lighting tends to flatten it into a featureless white wall. Side lighting strikes a middle ground, creating visible depth and separation between fog layers. Experiment with your machine’s timer function to synchronize bursts with specific moments in your shoot — a perfectly timed release just before a shutter click can capture fog in its most dynamic, swirling state rather than after it has settled into stillness.
Advanced Techniques for Portraits, Landscapes, and Product Shots
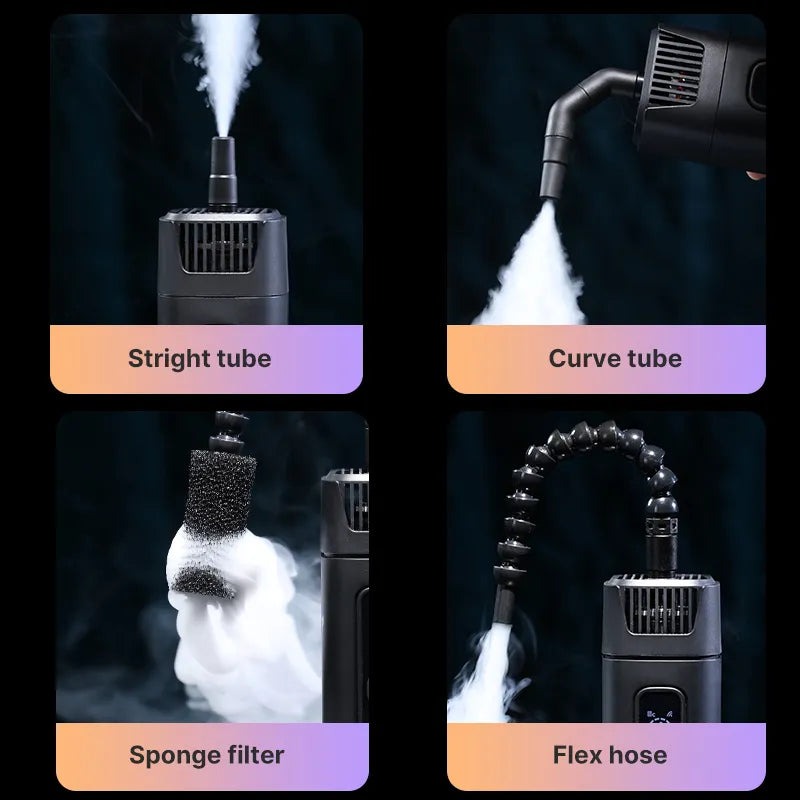
In portrait photography, fog serves as a natural diffuser that softens skin, reduces harsh shadow transitions, and creates a luminous quality around your subject. Position the fog machine behind or to the side of your subject rather than directly in front, allowing the vapor to wrap around them and separate them from the background. This produces a three-dimensional quality that flat backdrops simply cannot achieve. For landscape work, fog adds the layered depth that makes images feel expansive and immersive. Use a low-output setting and allow fog to drift naturally across the scene, capturing it as it moves between trees, over water, or along pathways — these transitional moments often yield the most compelling results. Combine natural morning mist with supplemental machine fog for scenes that feel organic rather than manufactured. Product photography benefits from fog in more subtle ways: a gentle haze behind a bottle of perfume, a whisper of vapor curling around a luxury watch, or a moody cloud beneath a pair of sneakers can instantly elevate a product from catalog-standard to campaign-worthy. In these controlled setups, direct a narrow stream of fog using PVC tubes or flexible ducting attached to the machine’s nozzle, giving you precision placement without flooding the entire set. Pairing fog with compact lighting accessories from brands like Ulanzi can help you shape precise light beams that cut through the haze for maximum visual impact. Regardless of the genre, always review your shots on a tethered monitor or camera screen between fog bursts — what looks perfect to the naked eye sometimes reads as too much or too little through the lens.
Practical Solutions and Troubleshooting Common Issues
Even with careful preparation, fog machines can behave unpredictably — and knowing how to diagnose problems quickly keeps your shoot on track. Weak or thin output is the most common complaint, and it usually traces back to one of two causes: the heating element hasn’t reached full operating temperature, or the fluid reservoir is running low. Give the machine adequate warm-up time before expecting full output, and top off the tank before each session rather than waiting for it to run dry. If the fog still feels underwhelming, check the nozzle for dried residue that may be partially blocking the output — a quick wipe with a damp cloth often restores full flow.
When a machine fails to heat entirely, inspect the power connection first. Loose plugs, underpowered extension cords, and tripped circuit breakers account for the majority of no-heat situations. If power delivery checks out, the thermal fuse or heating element itself may have failed, which typically requires professional repair or replacement. Uneven fog distribution — where vapor clusters in one area and leaves the rest of your frame clear — is best solved by repositioning the machine or introducing a small fan set to its lowest speed to gently push fog where you need it. Avoid pointing fans directly at the nozzle, which shreds the fog before it can form visible volume. For long-term reliability, flush your machine with distilled water after every few uses to prevent glycol buildup inside the pump and heating chamber. Store the unit upright in a dry location, and never leave old fluid sitting in the reservoir between shoots, as stagnant liquid can breed bacteria and clog internal lines. These simple maintenance habits extend your machine’s life significantly and ensure consistent performance when it matters most.
Mastering Safe and Creative Fog Machine Photography
Operating a fog machine effectively comes down to respecting two equally important priorities: safety and creative intention. The safety features built into your equipment — auto-shutoff, overheating protection, and fluid level indicators — aren’t obstacles to creativity; they’re the foundation that allows you to focus on your art without worrying about equipment failure or hazardous conditions. Understanding these systems, maintaining them properly, and following consistent pre-operation checks ensures that every shoot starts from a position of confidence rather than guesswork.
On the creative side, mastering adjustable fog intensity gives you the power to shape atmosphere precisely — from a barely-there haze that catches a single light beam to a dense, rolling cloud that transforms your entire scene. The photographers who produce consistently stunning fog-filled work aren’t relying on luck; they’ve developed a workflow that pairs technical discipline with artistic experimentation. Now that you have the knowledge to operate safely across indoor and outdoor environments, troubleshoot common issues on the fly, and control fog output with intention, the only thing left is to put it into practice. Start with simple setups, build your comfort level gradually, and push your creative boundaries knowing that safety and spectacle aren’t competing goals — they’re partners in every dramatic shot you create.