Every small business owner knows the frustration of unexpected equipment failures, hidden pipe leaks, or trying to diagnose problems in spaces too cramped for human eyes. These inspection challenges don’t just waste time—they drain budgets through emergency repairs, extended downtime, and missed deadlines. An inspection camera offers a practical solution, giving you visual access to areas that would otherwise require costly disassembly or guesswork. However, with dozens of models flooding the market at wildly different price points, choosing the right one can feel overwhelming. This guide cuts through the noise by breaking down essential camera features, providing a clear price comparison framework, and walking you through a step-by-step buying process designed specifically for small business needs. Whether you run a plumbing operation, manage an HVAC team, or oversee a manufacturing facility, the right inspection camera isn’t just a tool—it’s an investment that pays for itself by saving hours of labor and preventing expensive repairs before they escalate.
What is an Inspection Camera and Why It Matters for Your Business
An inspection camera—sometimes called an endoscope camera or borescope—is a compact visual tool featuring a small camera mounted on a flexible or rigid probe, designed to capture images and video in spaces impossible to see with the naked eye. These devices transmit real-time footage to a connected screen, allowing operators to assess conditions inside pipes, behind walls, within engine compartments, or along ductwork without destructive exploration.
For small businesses, the applications span nearly every hands-on industry. Plumbers use them to locate blockages and assess pipe integrity before committing to excavation. HVAC technicians inspect ductwork for mold, debris, or damage without removing ceiling panels. Automotive shops diagnose engine problems by viewing cylinders and intake manifolds directly. Manufacturing teams monitor equipment internals for wear or contamination during routine maintenance windows rather than waiting for catastrophic failure.
The business case is straightforward. An inspection camera reduces downtime by accelerating diagnosis from hours to minutes. It prevents costly repairs by catching small issues—a hairline crack, a developing corrosion spot—before they become emergencies. It also enhances workplace safety by eliminating the need to physically enter confined or hazardous spaces. For small business owners operating on tight margins, this combination of speed, prevention, and safety translates directly into stronger operational efficiency and a healthier bottom line.
Essential Camera Features to Boost Productivity
Selecting an inspection camera based on specifications rather than brand hype ensures you’re investing in camera features that directly impact how quickly and accurately your team completes jobs. The difference between a well-matched camera and a poorly chosen one often shows up in repeat site visits, misdiagnosed problems, and wasted labor hours. Here’s what matters most when productivity is the priority.
Resolution and Image Quality for Clear Inspections
Resolution determines whether you can distinguish a hairline fracture from a shadow or identify early-stage corrosion versus surface discoloration. HD resolution (720p or 1080p) handles most plumbing and HVAC diagnostics effectively, while 4K options benefit automotive and manufacturing applications where minute detail—such as micro-cracks in turbine blades or cylinder scoring—drives repair decisions. Beyond pixel count, sensor quality matters. A camera with a quality CMOS sensor performs significantly better in dark, confined spaces because it captures more light data per frame. Look for models that combine high resolution with adjustable exposure settings, as pipe interiors and engine cavities present vastly different lighting challenges that a fixed-setting camera handles poorly.
Flexibility and Reach: Cable Length and Articulation
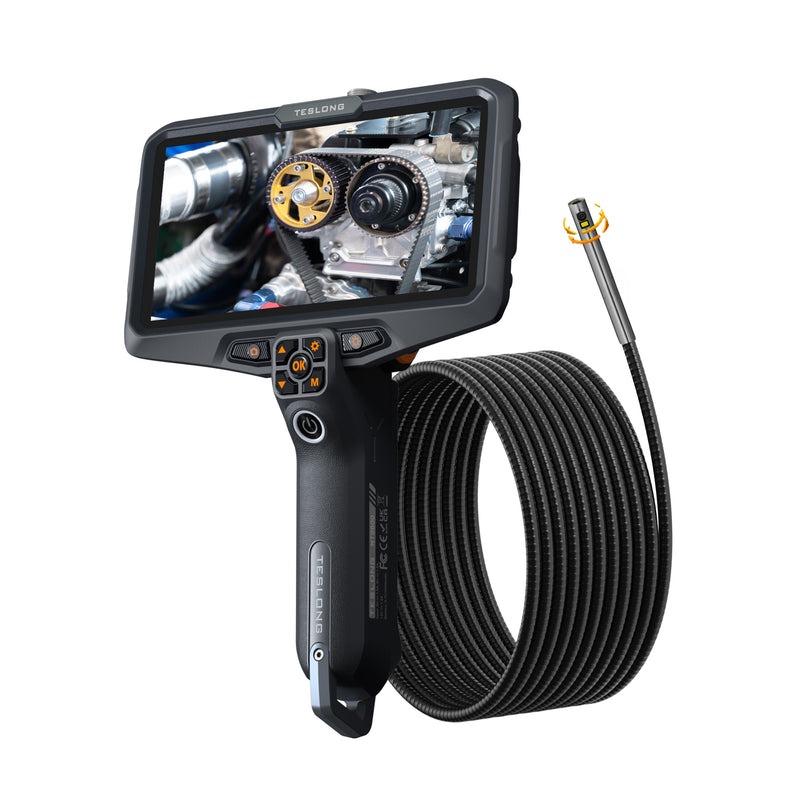
Cable length dictates which jobs you can handle without supplemental equipment. A 3-to-5-meter cable suits most wall cavity and short plumbing runs, while sewer inspections or industrial ductwork often demand 10 meters or more. However, length without maneuverability creates frustration—a long cable that can’t navigate bends is useless in real-world piping. Articulating tips, which allow the camera head to pivot 180 or even 360 degrees via joystick control, let operators steer around elbows and junctions without withdrawing and reinserting the probe. Semi-rigid cables offer a middle ground for businesses handling varied tasks, providing enough stiffness to push through horizontal runs while flexing around gradual curves. Match cable characteristics to your most common inspection environment to avoid paying for capability you won’t use.
Durability and Build Quality for Industrial Use
Inspection cameras endure harsh conditions daily—submerged in standing water, dragged through debris-filled pipes, exposed to chemical residues or extreme temperatures. An IP67 or IP68 waterproof rating on the camera head is essential for any business dealing with plumbing or outdoor infrastructure. The cable sheathing should resist abrasion from rough pipe interiors, and the control unit needs impact-resistant housing that survives drops onto concrete floors. Stainless steel camera heads outperform plastic alternatives in longevity, particularly in environments with chemical exposure. For small businesses, durability directly affects cost-effectiveness—a rugged camera that lasts five years without probe replacement delivers far better value than a cheaper unit requiring annual repairs or cable swaps.
Additional Features: Lighting, Recording, and Connectivity
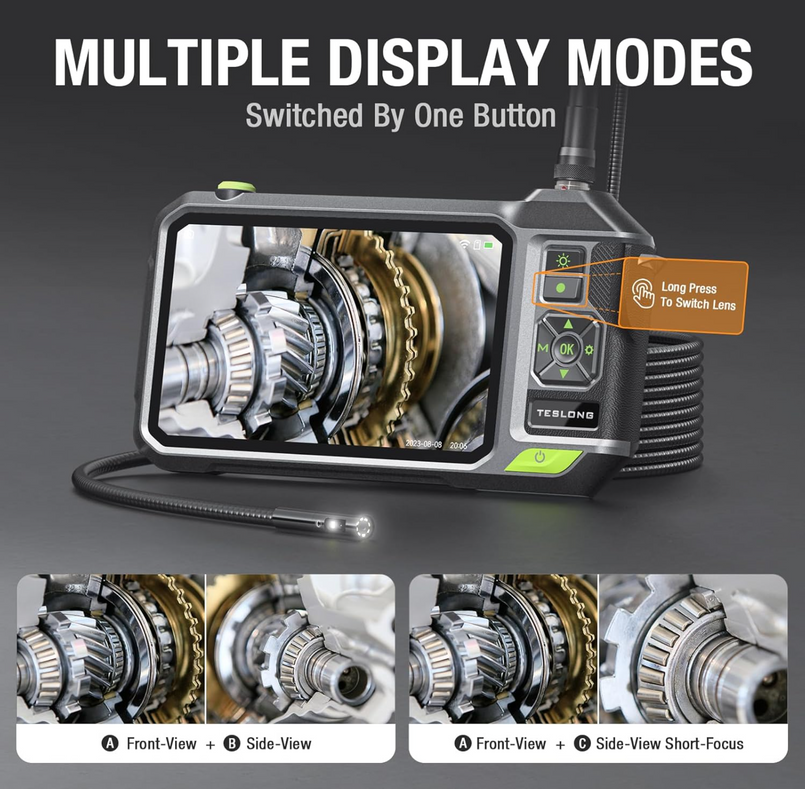
Adjustable LED lighting built into the camera head is non-negotiable for inspection work, since nearly every target environment lacks ambient light. Models offering variable brightness levels prevent glare on reflective surfaces like wet pipes while still illuminating dark cavities adequately. Video and image recording capabilities transform an inspection camera from a diagnostic tool into a documentation system—you can show clients exactly what you found, create before-and-after records, and build maintenance histories for repeat customers. Storage options range from onboard SD cards to direct-to-device streaming. Wi-Fi and Bluetooth connectivity allow real-time sharing with team members or clients on-site, and simplify transferring footage to cloud storage or reporting software. These connectivity features integrate your inspection camera with broader business workflows, turning field data into actionable records without manual file handling.
Price Comparison: Getting the Best Value for Your Investment
For small business owners, every equipment purchase demands justification—and inspection cameras span a wide enough price range that choosing without a structured comparison risks either overspending on unnecessary capabilities or underspending on a tool that fails within months. Understanding what drives price differences helps you land on a model that delivers genuine return without straining cash flow.
Several factors influence where a camera falls on the price spectrum. Resolution and sensor quality account for significant cost differences, with 4K-capable models commanding a premium over standard HD units. Cable length and articulation add cost proportionally—a 20-meter articulating probe costs substantially more than a 3-meter semi-rigid option. Build quality materials like tungsten-reinforced cables or sapphire lens covers push prices upward but dramatically extend service life. Brand reputation also plays a role, though manufacturers like Teslong that specialize in borescope technology occasionally deliver strong performance at competitive price points when their specifications match or exceed established competitors.
When comparing models, organize your evaluation around three tiers: entry-level units suited for occasional inspections with basic documentation needs, mid-range models offering HD resolution with moderate cable lengths and solid waterproofing for daily professional use, and premium systems designed for specialized industrial applications requiring maximum reach, articulation, and recording capability. Create a simple spreadsheet listing your must-have features from the previous section, then score each candidate model against those requirements rather than comparing raw feature lists that may include capabilities irrelevant to your work.
To maximize value, look for manufacturer bundles that include carrying cases, replacement probe tips, or extended warranties. Seasonal promotions from industrial tool suppliers, trade show discounts, and refurbished units from authorized dealers can reduce costs by 15–30 percent without sacrificing warranty coverage. Avoid sacrificing waterproofing or resolution to save money—these are the features that prevent costly re-purchases when a budget unit fails mid-job.
Your Step-by-Step Buying Guide for Inspection Cameras
Knowing which features matter is only half the equation—executing a smart purchase requires a structured approach that prevents impulse buying and ensures the camera you select actually fits your daily operations. This buying guide walks you through four actionable steps that move you from identifying needs to deploying a camera that earns its keep from day one.
Step 1: Assess Your Business Needs and Inspection Tasks
Start by documenting your most common inspection scenarios over the past six months. What spaces do you need to access—pipes under 4 inches in diameter, wall cavities, machinery internals? How frequently does your team perform inspections—daily, weekly, or only during scheduled maintenance? Environmental conditions shape your requirements significantly. If your crews work in wet environments or submerged conditions, waterproofing becomes mandatory rather than optional. Dusty manufacturing floors or chemically active settings demand sealed housings and corrosion-resistant probes. Write down the three to five inspection tasks that consume the most labor time or generate the most callbacks, then use those as your baseline requirements for every feature decision that follows.
Step 2: Set a Budget Based on Required Features
With your needs documented, assign priority levels to each feature—resolution, cable length, articulation, durability, and connectivity. Your budget should reflect the features that directly eliminate your biggest pain points rather than covering every possible capability. Calculate the cost of your current inspection inefficiencies: hours spent on repeat visits, emergency repair bills from missed diagnoses, or subcontractor fees for tasks you could handle in-house with proper equipment. Frame your camera budget as a percentage of those recoverable costs. A camera that eliminates even two unnecessary service calls per month often justifies a mid-range investment within the first quarter. Avoid setting an arbitrary spending cap before understanding what your must-have features actually cost across available models.
Step 3: Research and Compare Models Using Online Resources
Narrow your options to three or four models that meet your prioritized feature list, then dig into real-world performance data. Professional trade forums and verified buyer reviews from other small business operators provide more reliable insights than manufacturer marketing. Cross-reference specifications against your documented needs using the spreadsheet approach from the price comparison section. Check whether advertised cable lengths include the probe head or measure only the flexible section. Verify waterproof ratings apply to the full probe assembly, not just the camera tip. Online price comparison tools help track pricing fluctuations across retailers, and setting alerts for your shortlisted models can catch temporary discounts. Industry-specific buying guide resources from trade associations often highlight models proven in your exact application.
Step 4: Make the Purchase and Conduct Initial Testing
Purchase from authorized dealers or reputable industrial suppliers who honor full manufacturer warranties and accept returns if the unit arrives defective. Verify warranty terms cover the probe and cable separately from the control unit, since cables experience the most wear. Upon arrival, test the camera immediately rather than shelving it until the next job. Run the probe through conditions mimicking your typical inspections—check image clarity at maximum cable extension, verify LED brightness across settings, confirm recording functions save usable footage, and test wireless connectivity range if applicable. Document any issues within the return window. A 30-minute initial testing session prevents discovering limitations mid-job when a client is waiting and your credibility is on the line.
Integrating Inspection Tools into Your Business Operations
Purchasing an inspection camera is only the starting point—extracting maximum value requires deliberate integration into your existing workflows and team practices. An inspection camera works best when paired with complementary inspection tools such as moisture meters, thermal imaging devices, or pipe locators that together provide a complete diagnostic picture. When your plumber uses a camera to identify a blockage, a locator pinpoints its exact position above ground, eliminating exploratory digging. When your HVAC technician spots suspected mold on camera, a moisture meter confirms the underlying cause immediately rather than requiring a second visit.
Staff training deserves dedicated attention beyond a quick demonstration on delivery day. Schedule hands-on practice sessions where team members navigate the probe through test environments, adjust lighting settings, and practice recording and labeling footage for client reports. Operators comfortable with the equipment complete inspections faster and capture more useful diagnostic data. Establish a maintenance routine that includes cleaning the probe after each use, inspecting cable sheathing for wear weekly, and calibrating image settings monthly. These habits prevent gradual performance degradation that leads to missed defects or premature equipment failure.
Measure your return on investment through concrete efficiency metrics: track the reduction in repeat service calls, compare average diagnosis time before and after camera deployment, and monitor how often early detection prevents emergency repairs. Most small businesses recover their camera investment within three to six months when they consistently apply it to routine inspections rather than reserving it for emergencies. Over time, the inspection data you accumulate builds institutional knowledge about recurring problem areas, enabling predictive maintenance strategies that keep your operations running smoothly and your clients confident in your expertise.
Turn Your Inspection Camera Into a Long-Term Business Asset
Choosing the right inspection camera isn’t about finding the most expensive model or the one with the longest feature list—it’s about matching a tool precisely to your business operations so it delivers measurable returns in saved time, prevented repairs, and improved diagnostic accuracy. This guide has walked you through understanding what inspection cameras do and why they matter for hands-on industries, identifying the essential camera features that directly drive productivity, applying a structured price comparison approach that protects your budget without sacrificing critical capabilities, and following a step-by-step buying guide that moves you from needs assessment through confident purchase and deployment. The businesses that extract the most value from their inspection equipment are those that treat it as a core operational asset rather than an occasional convenience—integrating it into daily workflows, training staff thoroughly, and tracking efficiency gains over time. Take the framework outlined here, apply it to your specific inspection challenges, and invest in a camera that works as hard as your team does. The payoff in reduced downtime, fewer emergency calls, and stronger client confidence will speak for itself within months.