Developers and tech enthusiasts constantly grapple with a fundamental challenge: creating reliable, isolated testing environments without breaking the bank or consuming excessive space and power. Traditional server setups demand significant financial investment, generate substantial heat, and drive up electricity costs, making them impractical for home use. Single-board PCs have emerged as a game-changing alternative, offering remarkable processing power in compact, energy-efficient packages that fit perfectly into home environments. These versatile devices enable professionals to build sophisticated homelabs capable of running multiple services, testing applications, and experimenting with new technologies. This article explores how to construct a robust homelab infrastructure using single-board computers, with particular focus on leveraging devices like the ZimaBoard 2 to meet demanding project requirements. Whether you’re a software developer needing isolated test environments, a system administrator honing your skills, or a tech hobbyist exploring new possibilities, building a homelab with single-board PCs delivers professional-grade capabilities at a fraction of traditional costs while maintaining flexibility and scalability for future growth.
Why Single-Board PCs Are Revolutionizing Homelabs for Developers
Single-board PCs have transformed how developers and tech enthusiasts approach homelab construction, gaining massive traction in online communities and professional circles. Unlike traditional rack-mounted servers that demand dedicated cooling systems and substantial power infrastructure, these compact devices deliver impressive computational capabilities while consuming minimal electricity—often just 6-15 watts compared to 300-500 watts for conventional servers. Their affordability makes professional-grade experimentation accessible, with capable single board pc units available at a fraction of traditional server costs, eliminating financial barriers that previously restricted homelab projects to well-funded enterprises. The compact form factor addresses space constraints in home offices and apartments, where bulky server racks simply aren’t feasible. Modern single-board computers have evolved far beyond their hobbyist origins, now featuring multi-core processors, substantial RAM capacity, multiple network interfaces, and native support for enterprise technologies like virtualization and containerization. This combination directly addresses developers’ core requirements: reliable hardware for continuous integration testing, sufficient processing power for running multiple concurrent services, and flexible networking options for simulating complex production environments. Energy efficiency translates to sustainable long-term operation without guilt over environmental impact or shocking utility bills, making these devices practical for 24/7 operation that real-world testing scenarios demand.
Choosing the Right Single-Board PC: Evaluating the ZimaBoard 2 as a Powerful Single-Board Server
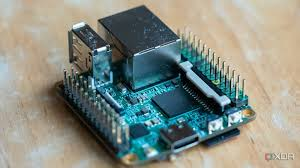
Selecting the appropriate single-board PC for your homelab requires careful evaluation of your specific workload demands and future scalability needs. Popular options like Raspberry Pi 4 offer excellent entry points for basic projects, while devices such as the ODROID-N2+ provide stronger processing capabilities for intermediate workloads. The ZimaBoard 2 stands out as a compelling choice for developers requiring serious computational power, featuring x86 architecture that ensures broad software compatibility with enterprise applications and development tools. When comparing options, prioritize processor architecture first—x86 boards run standard Linux distributions and Windows without compatibility concerns, while ARM devices may require specialized builds. Memory capacity directly impacts how many concurrent services your homelab can support; aim for at least 8GB RAM for running multiple virtual machines or containers simultaneously. Network connectivity proves critical for homelab clusters, making dual Gigabit Ethernet ports or faster interfaces essential for segregating management traffic from production workloads. Storage flexibility matters significantly—look for SATA ports, M.2 slots, or PCIe expansion options that accommodate fast SSDs for database testing or NAS functionality. The ZimaBoard 2 excels in these criteria, delivering Intel Celeron processing power, support for up to 16GB RAM, dual Ethernet ports for advanced networking configurations, and multiple storage expansion options that accommodate growing data requirements without external adapters.
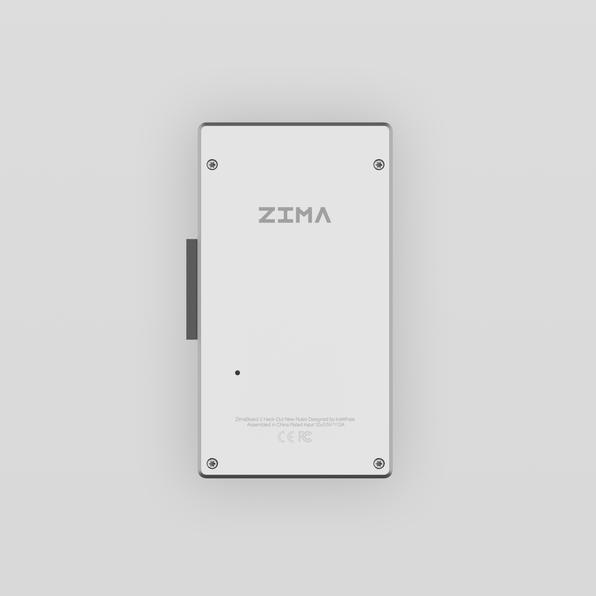
Key Features of the ZimaBoard 2 for Demanding Projects
The ZimaBoard 2 combines Intel Celeron quad-core processing with native PCIe expansion slots, enabling graphics card integration or high-speed network adapters for specialized testing scenarios. Its dual SATA 6Gb/s ports support RAID configurations for redundant storage, while onboard M.2 slots accommodate NVMe drives for lightning-fast boot times and database operations. The device ships with comprehensive Linux distribution support including Ubuntu Server, Debian, and CasaOS, plus compatibility with virtualization platforms like Proxmox and VMware ESXi, making it genuinely versatile for complex developer test labs requiring enterprise-grade software stacks.
Step-by-Step Guide to Building Your Homelab Infrastructure
Building your homelab infrastructure begins with careful planning of physical layout and power requirements. Start by selecting a dedicated location with adequate ventilation—single-board PCs generate minimal heat but still need airflow, especially when clustered. Mount your boards using standoffs or rack-mountable cases designed for single-board computers, ensuring each device has clearance for heat dissipation. Connect your primary single-board server to an uninterruptible power supply (UPS) to protect against data corruption during power fluctuations. For networking, use a managed switch with VLAN support to segment traffic between management interfaces, storage networks, and test environments. Configure one Ethernet port on your ZimaBoard 2 for management access and dedicate the second port to storage or cluster communication, creating isolated network paths that prevent traffic congestion during intensive operations. Cable management matters even in compact setups—use color-coded Ethernet cables to distinguish network segments and label each connection point for troubleshooting efficiency.
Initial Hardware Assembly and Connectivity
Begin assembly by securing your single-board PC to its mounting surface using proper standoffs to prevent short circuits. Connect power supplies rated for continuous operation rather than generic adapters. Attach your primary storage drive—preferably an NVMe SSD in the M.2 slot for the operating system, reserving SATA ports for data storage. Connect both Ethernet ports to your managed switch, then attach a monitor and keyboard for initial configuration. Boot the device and access BIOS to verify all hardware detection before proceeding with OS installation.
Configuring Storage and Backup Solutions
Install your chosen operating system on the NVMe drive, then configure SATA drives in RAID 1 for redundant data storage using mdadm on Linux systems. Create separate partitions for virtual machine images, container volumes, and project data. Implement automated backup solutions using rsync or Restic to external USB drives or network-attached storage, scheduling nightly incremental backups during low-activity periods. Configure snapshot functionality if using ZFS or Btrfs filesystems, enabling point-in-time recovery for critical development databases and configuration files that protect against accidental deletions or corrupted deployments. For developers requiring centralized file storage across multiple devices, Zima’s network-attached storage solutions integrate seamlessly with homelab environments, providing reliable backup targets with straightforward configuration.
Configuring Developer Test Labs and Homelab Clusters for Optimal Performance
Software configuration transforms your single-board PC hardware into a fully functional developer test lab capable of simulating complex production environments. Begin by installing a hypervisor like Proxmox VE or KVM/QEMU, which enables running multiple isolated operating systems simultaneously on your ZimaBoard 2. Allocate resources strategically—dedicate 4GB RAM and two CPU cores to your primary development VM, reserving remaining capacity for secondary services like databases or monitoring tools. For containerized workloads, install Docker and configure resource limits using cgroups to prevent any single container from monopolizing system resources during intensive testing. Kubernetes transforms multiple single-board PCs into powerful homelab clusters; designate your ZimaBoard 2 as the control plane node and add additional boards as worker nodes, creating a true distributed system for testing microservices architectures. Configure separate VLANs for cluster communication, ensuring pod-to-pod traffic doesn’t interfere with management access. Implement network policies within Kubernetes to simulate production security constraints, testing how your applications behave under realistic network segmentation. Version control your infrastructure configurations using tools like Ansible or Terraform, enabling reproducible deployments that eliminate “works on my machine” scenarios.
Setting Up Virtual Machines and Containers
Create VM templates for commonly used operating systems—Ubuntu Server, CentOS, and Windows Server—cloning these templates for rapid test environment provisioning. Install Docker Engine and configure Docker Compose for multi-container applications, defining service dependencies in YAML files that mirror production architectures. Use LXC containers for lightweight Linux environments requiring minimal overhead, perfect for testing command-line tools or scripts without full virtualization costs.
Automating Deployments and Monitoring
Install GitLab Runner or Jenkins on dedicated VMs to establish continuous integration pipelines that automatically test code commits. Configure webhooks triggering automated builds whenever developers push changes, running unit tests and integration tests within isolated containers. Deploy Prometheus and Grafana for comprehensive monitoring, collecting metrics on CPU usage, memory consumption, and network throughput across your homelab cluster. Set up alerting rules that notify you when resource thresholds exceed safe operating limits, preventing performance degradation during critical testing phases.
Best Practices for Maintaining and Scaling Your Homelab
Maintaining your homelab requires consistent security practices and proactive performance management to ensure reliable operation over time. Implement automated update schedules using unattended-upgrades on Debian-based systems or dnf-automatic on Red Hat derivatives, applying security patches during maintenance windows to minimize disruption. Configure firewall rules restricting access to management interfaces, using SSH key authentication instead of passwords and implementing fail2ban to block brute-force attempts. Monitor disk health using smartmontools, setting up alerts for failing drives before data loss occurs. As your projects expand, scale horizontally by adding additional single-board PCs to your homelab cluster—Kubernetes seamlessly integrates new worker nodes, distributing workloads automatically across expanded capacity. Document your infrastructure configurations in version-controlled repositories, enabling quick recovery if hardware failures necessitate rebuilding services on replacement devices. Regular performance profiling identifies bottlenecks before they impact development workflows, using tools like htop and iotop to track resource consumption patterns and optimize service placement across cluster nodes for balanced utilization.
Building Your Professional Development Environment at Home
Building a robust homelab with single-board PCs represents a transformative approach to creating professional-grade development environments without the financial burden and space requirements of traditional server infrastructure. This guide has walked you through the essential steps: understanding why single-board computers have revolutionized homelab construction, selecting appropriate hardware like the ZimaBoard 2 that delivers genuine computational power for demanding workloads, assembling your physical infrastructure with proper networking and storage configurations, deploying virtualization and containerization platforms for isolated testing environments, and implementing maintenance practices that ensure long-term reliability and scalability. The ZimaBoard 2 and similar single-board servers provide developers with high-performance options that support complex homelab clusters, enabling realistic simulation of production architectures for thorough application testing. By following these practical steps, you’ve gained the knowledge to construct a flexible, energy-efficient homelab that grows alongside your projects while maintaining professional capabilities. Whether you’re testing microservices deployments, honing system administration skills, or experimenting with emerging technologies, your single-board PC homelab delivers the reliable infrastructure necessary for serious development work. Start your homelab journey today and unlock new possibilities for learning, experimentation, and professional growth in your own space.